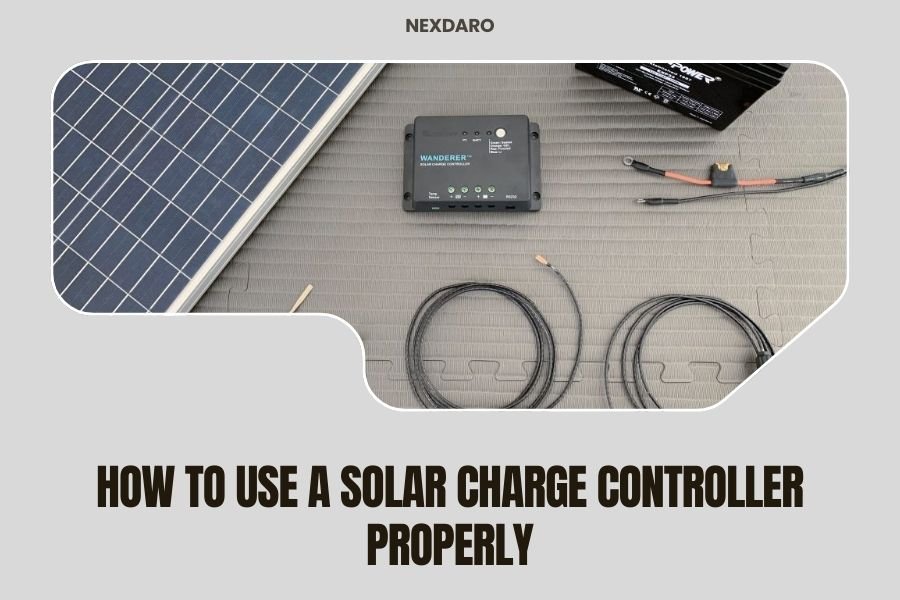
A solar charge controller connects between your solar panel and battery to prevent overcharging and regulate power flow safely.
You’ll need to match the controller type to your battery, set proper voltage parameters, and monitor the charging process regularly for optimal performance.
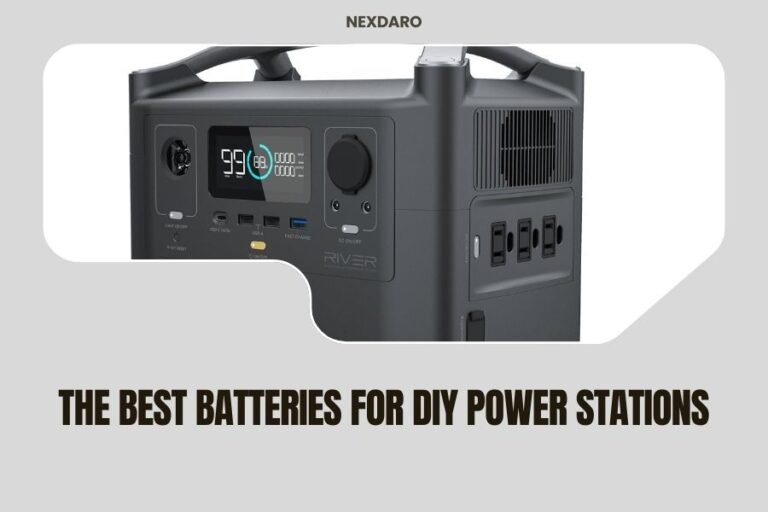
What Is a Solar Charge Controller
Think of a solar charge controller as the traffic cop for your solar power system. It stands between your solar panels and battery, making sure electricity flows at the right speed and stops when needed.
Without this device, your solar panels would keep pumping power into your battery even when it’s full. That’s like trying to fill a water balloon that’s already stretched to its limit. The result? A damaged battery and potentially dangerous conditions.
Two Main Types You Need to Know
PWM (Pulse Width Modulation) controllers work like a simple on-off switch. They’re cheaper and work fine for basic setups.
MPPT (Maximum Power Point Tracking) controllers are smarter. They adjust constantly to squeeze the most power from your panels. I found that MPPT units can boost efficiency by 20-30% compared to PWM models.
Choosing the Right Controller Size
Getting the size wrong is like buying shoes that don’t fit. Too small, and you waste solar power. Too big, and you waste money.
Calculate Your Amp Requirements
Take your total solar panel watts and divide by your battery voltage. Add 25% as a safety buffer.
For example: 400 watts of panels ÷ 12 volts = 33.3 amps. Add 25% safety margin = 42 amps minimum controller size.
Don’t Forget Voltage Matching
Your controller must handle your system voltage. Most portable setups use 12V or 24V systems. Check your battery specs first.
Setting Up Your Solar Charge Controller
Installation order matters. Get it wrong, and you might fry your equipment.
Step 1: Connect the Battery First
Always connect your battery to the controller before anything else. This step powers up the controller so it can recognize your battery type.
Use the positive and negative battery terminals on your controller. Red wire goes to positive, black to negative. Simple as that.
Check Your Connections
Loose connections create resistance and heat. Tighten everything snugly, but don’t overtighten and strip the terminals.
Step 2: Connect Your Solar Panels
Now you can safely connect your panels to the solar input terminals. Again, red to positive, black to negative.
If you’re connecting multiple panels, wire them properly first. Series connections add voltage. Parallel connections add current.
Morning Setup Tip
Do this work in the morning or evening when panel output is low. Working with full sun blazing can give you a nasty shock.
Step 3: Add Your Load Connections
Many controllers have load terminals for connecting devices directly. This gives you extra protection and monitoring.
You can skip this step if you’re connecting loads directly to your battery through other means.
Programming Your Controller Settings
Modern controllers need programming to work with your specific battery type. It’s like setting your phone’s language preferences.
Battery Type Selection
This is the most important setting. Choose from sealed, gel, flooded, or lithium battery types.
Each type needs different charging voltages. Get this wrong, and you’ll either undercharge or damage your battery.
Common Battery Settings
| Battery Type | Bulk Voltage (12V) | Float Voltage (12V) |
|---|---|---|
| Sealed Lead Acid | 14.4V | 13.6V |
| Gel | 14.2V | 13.8V |
| Flooded | 14.6V | 13.2V |
| Lithium | 14.4V | 13.6V |
Temperature Compensation
Batteries need different voltages in hot and cold weather. Enable temperature compensation if your controller has a temperature sensor.
Cold batteries need higher voltage to charge properly. Hot batteries need lower voltage to prevent damage.
Daily Operation and Monitoring
Your controller works automatically once set up. But checking on it helps catch problems early.
Understanding the Display
Most controllers show battery voltage, charging current, and daily energy harvested. Learn what normal numbers look like for your system.
Battery voltage tells you charge level. Charging current shows how hard your panels are working. Daily totals help track performance over time.
Normal Charging Stages
Your controller cycles through three stages: bulk, absorption, and float.
- Bulk stage: Maximum current flows until battery reaches about 80% charge
- Absorption stage: Voltage stays constant while current tapers down
- Float stage: Low voltage maintains full charge without overcharging
Troubleshooting Common Issues
No charging current? Check your panel connections and make sure panels aren’t shaded.
Error codes flashing? Consult your manual. Most errors relate to voltage mismatches or loose connections.
When to Reset Your Controller
If your controller acts erratically, try powering it down completely. Disconnect everything, wait 30 seconds, then reconnect battery first, then panels.
Seasonal Adjustments and Maintenance
Your charging needs change with the seasons. Summer brings long days and hot batteries. Winter means short days and cold batteries.
Winter Considerations
Cold batteries charge slower and need higher voltages. Check if your controller adjusts automatically or needs manual tweaking.
Snow covering your panels obviously stops charging. A simple brush or squeegee gets them working again.
Preventing Freeze Damage
Lead-acid batteries can freeze if discharged too much in cold weather. Keep them charged above 50% when possible.
Summer Adjustments
High temperatures can damage batteries. Make sure your temperature compensation is working.
Consider adding ventilation around your battery area if it gets very hot.
Advanced Features Worth Using
Modern controllers pack features that can make your life easier. Don’t ignore them.
Load Control Settings
You can program your controller to turn loads on and off automatically. Set lights to come on at sunset, or disconnect loads if battery voltage drops too low.
Timer Functions
Some controllers let you set timer-based load control. Run a fan for two hours after sunset, then shut it off automatically.
Data Logging and Apps
High-end controllers connect to smartphone apps. You can monitor your system remotely and get alerts for problems.
Historical data helps you spot trends and optimize your system over time.
Safety Considerations
Solar systems deal with DC electricity, which can be dangerous. Respect it.
Fuse Protection
Install fuses between your battery and controller, and between panels and controller. This protects against short circuits.
Use fuses rated about 25% higher than your expected maximum current.
Proper Grounding
Ground your system properly. This prevents electrical shock and reduces fire risk.
Regular Inspection
Check connections monthly for corrosion or looseness. Look for any signs of overheating like discolored wires or melted plastic.
Conclusion
Using a solar charge controller properly comes down to three key steps: choosing the right size, setting it up in the correct order, and programming it for your battery type. Start with battery connections first, then panels, then loads. Set your battery type correctly and monitor the system regularly.
Remember that your controller is the brain of your solar system. Treat it well, and it’ll keep your batteries healthy for years. Take shortcuts, and you’ll likely end up replacing expensive batteries sooner than you’d like.
Can I use a PWM controller with lithium batteries?
Yes, but you’ll need to set the charging voltages correctly for lithium batteries. PWM controllers work fine with lithium, though MPPT controllers will give you better efficiency and faster charging times.
What happens if my solar panels produce more power than my controller can handle?
The controller will limit the current to its maximum rating, but excess power gets wasted as heat. This can damage the controller over time. Always size your controller to handle at least 125% of your panel output.
How do I know if my controller is working properly?
Check that it shows charging current during sunny conditions and cycles through bulk, absorption, and float stages properly. The battery voltage should rise during charging and stabilize when full. Most controllers also have LED indicators or displays showing system status.
Can I connect different types of solar panels to the same controller?
You can mix different panels, but they should have similar voltage ratings for best results. Different current ratings are fine when wired in parallel. Mixing drastically different panel types can reduce overall system efficiency.
Why does my controller show different power readings throughout the day?
Solar panel output varies with sun angle, weather conditions, and temperature. Maximum power typically occurs around midday with clear skies. Cloud cover, shade, and extreme temperatures all reduce panel output, which your controller accurately reflects.