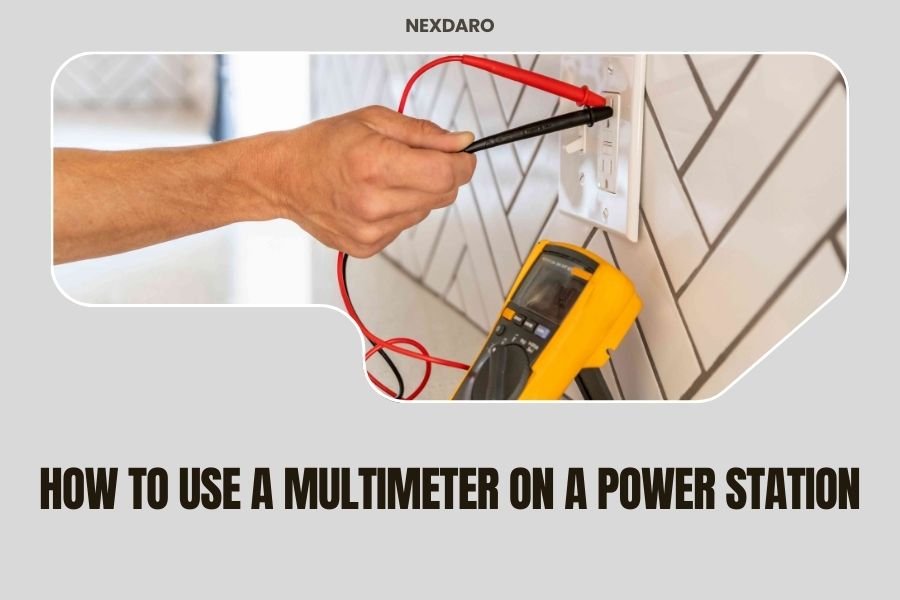
Using a multimeter on a power station involves connecting the multimeter probes to the appropriate ports and selecting the correct measurement mode to test voltage, current, or battery capacity.
You’ll need to set your multimeter to DC voltage mode and connect the red probe to positive and black probe to negative terminals to get accurate readings from your portable power station.
What You Need Before Starting
Before you grab your multimeter, make sure you have the right tools. A basic digital multimeter works fine for most power station testing. You don’t need anything fancy or expensive.
Check that your multimeter has fresh batteries. Dead batteries give wonky readings. Trust me, I’ve learned this the hard way after spending twenty minutes wondering why my readings looked off.
You’ll also want to gather your power station manual. Different brands have different port layouts and specifications. What works for a Jackery might not apply to your EcoFlow.
Safety Gear Checklist
- Insulated gloves (optional but smart)
- Safety glasses
- Clean, dry workspace
- Good lighting
Understanding Your Power Station’s Ports
Power stations have multiple output types. Each one serves different devices and requires different testing approaches.
AC outlets work like your wall sockets at home. DC ports include USB, 12V car outlets, and sometimes barrel connectors. Each type needs specific testing methods.
DC Output Ports
DC ports are easiest to test. They provide steady voltage that your multimeter reads clearly. Most power stations have 5V USB ports, 12V car outlets, and sometimes 19V laptop ports.
The voltage should stay close to the rated output. A 12V port reading 11.8V to 12.3V is normal. Anything below 11V might signal problems.
AC Output Testing
AC outlets are trickier. The voltage alternates rapidly, so your multimeter needs AC mode. Most power stations output 110V-120V in North America.
Some cheaper multimeters struggle with modified sine wave inverters. If your readings seem weird, that might be why.
Step-by-Step Voltage Testing
Start with the power station turned on but no devices connected. This gives you the cleanest baseline reading.
Set your multimeter to DC voltage mode. The symbol looks like a straight line above a dashed line. Make sure the range covers your expected voltage.
Testing DC Outputs
Connect the red probe to the positive terminal. The black probe goes to negative or ground. For USB ports, red goes in the power pin, black in the ground pin.
Read the display. Write down the number. Good power stations hold voltage steady within 5% of the rated output.
USB Port Testing Tips
USB ports can be finicky to test. The pins are small and close together. Some people use old USB cables with exposed wires for easier connections.
USB-A ports should read close to 5V. USB-C ports might show 5V, 9V, 12V, or 20V depending on the power delivery standard.
Testing AC Outputs
Switch your multimeter to AC voltage mode. This usually shows as a wavy line or “AC” symbol.
Stick the probes into the outlet slots. Red probe in the hot slot, black in neutral. Be careful not to touch the metal probe tips.
AC voltage readings bounce around more than DC. That’s normal. Look for an average reading near 110V-120V.
Measuring Current Draw
Current testing tells you how much power your devices actually use. This helps estimate battery runtime and spot power-hungry gadgets.
Current testing requires breaking the circuit. You become part of the electrical path between the power station and your device.
Setting Up Current Measurement
Move your red probe to the current input on your multimeter. Most multimeters have separate jacks for different current ranges.
Set the dial to DC current mode. Start with a higher range like 10A, then switch to lower ranges for more precision.
Series Connection Method
Connect the power station positive to your multimeter’s red probe. Connect the black probe to your device’s positive input. The negative connections go directly together.
Turn everything on. Your multimeter now shows the current flowing through the circuit. Write down the reading for your records.
Battery Capacity Testing
True capacity testing takes time. You need to discharge the battery completely while measuring the total energy output.
Most people skip this because it takes 8-20 hours depending on the load. But it gives you the most accurate picture of battery health.
Quick Capacity Estimates
For faster estimates, check voltage under load. Connect a known load like a 60W light bulb. Measure the voltage after 5 minutes.
Healthy batteries maintain voltage well under load. Weak batteries show voltage drops of more than 10% from their no-load readings.
Reading and Interpreting Results
Good readings don’t guarantee perfect performance. But bad readings definitely signal problems.
Voltage should stay within 5-10% of rated values. Current should match your device specifications. Large differences mean something needs attention.
Normal Voltage Ranges
| Output Type | Expected Range | Concern Level |
|---|---|---|
| USB 5V | 4.75V – 5.25V | Below 4.5V |
| 12V DC | 11.5V – 12.5V | Below 11V |
| AC 120V | 110V – 125V | Below 105V |
Common Testing Mistakes
Wrong multimeter settings cause most bad readings. Double-check you’re in the right mode before panicking about your power station.
Loose connections also mess up readings. Make sure your probes make solid contact with the terminals.
Probe Connection Errors
Reversed probes give negative readings on DC measurements. Red should always go to positive, black to negative or ground.
Touching probe tips together while connected gives zero readings. Keep them separated and clean.
Environmental Factors
Cold batteries read lower voltages. Hot power stations might show higher readings. Test at room temperature when possible.
Dirty terminals create resistance. Clean them with a dry cloth before testing for the most accurate results.
When to Test Your Power Station
Test new power stations right out of the box. This gives you baseline numbers for comparison later.
Regular testing every 3-6 months helps catch problems early. Batteries degrade slowly, so changes happen gradually.
Before and After Storage
Test before storing your power station for winter or long periods. Test again when you bring it back out.
Storage can affect battery chemistry. Knowing the impact helps you plan for replacement or maintenance.
Troubleshooting Bad Readings
Wildly wrong readings usually mean user error, not broken power stations. Start by checking your multimeter setup.
Verify your multimeter works on known good sources like regular batteries. This confirms your meter isn’t the problem.
No Reading at All
No readings often mean the power station output is off. Many models need button presses to activate different port types.
Check that you’re testing the right ports. Some power stations have dummy ports that look real but don’t work.
Inconsistent Readings
Bouncing numbers might indicate loose connections or failing components. Try different ports to see if the problem follows specific outputs.
Some power stations have voltage regulation problems. These show up as readings that drift over time or change with load.
Advanced Testing Techniques
Load testing gives better information than no-load voltage checks. Real devices stress the power station’s regulation circuits.
Try connecting different loads while monitoring voltage. Good power stations maintain steady output regardless of the connected device.
Efficiency Testing
Measure input power during charging and output power during use. The difference shows conversion losses in the power station’s electronics.
Most power stations lose 10-20% to heat and conversion inefficiencies. Higher losses might indicate problems.
Conclusion
Testing your power station with a multimeter gives you real data about its performance and health. The process isn’t complicated once you understand the basics of probe placement and meter settings.
Regular testing helps you catch problems before they strand you without power. It also helps you understand how your devices affect battery life and plan accordingly for your next outdoor adventure.
Remember that safety comes first. Take your time, double-check your connections, and don’t hesitate to ask for help if you’re unsure about any step. Your power station is an investment worth protecting.
Can I damage my power station by testing it with a multimeter?
Basic voltage testing is very safe and won’t damage your power station. Current testing requires more care since you’re interrupting the circuit, but following proper procedures keeps both you and your equipment safe.
What multimeter features do I need for power station testing?
A basic digital multimeter with DC voltage, AC voltage, and DC current modes handles most power station testing. Look for one that reads at least 20V DC, 200V AC, and 10A current for complete coverage.
How often should I test my portable power station?
Test your power station every 3-4 months during regular use, and always before and after long-term storage. Also test it if you notice decreased runtime or unusual behavior from connected devices.
Why do my AC outlet readings fluctuate more than DC readings?
AC voltage naturally alternates 60 times per second, causing multimeter readings to bounce slightly. This is normal behavior. DC voltage is steady, so those readings should be rock solid on a healthy power station.
What should I do if my power station fails multimeter testing?
First, retest with a different multimeter to confirm the readings. If problems persist, check your user manual for troubleshooting steps. Many issues resolve with a simple reset, but persistent problems usually require professional repair or warranty service.