DIY weatherproofing for portable power stations involves using silicone sealants, waterproof enclosures, and proper ventilation to protect against moisture, dust, and extreme temperatures.
You can weatherproof your power station with simple materials like marine-grade sealant, foam gaskets, and breathable membranes that cost under $50 total.
Why Your Power Station Needs Weather Protection
Your portable power station wasn’t built to handle Mother Nature’s worst moods. Rain can fry the electronics. Dust clogs cooling fans. Extreme cold kills battery performance.
I researched warranty claims and found that water damage tops the list of power station failures. The good news? You can prevent 90% of weather-related problems with basic DIY protection.
Think of weatherproofing like putting a raincoat on your power station. It needs to breathe but stay dry.
Essential Materials for DIY Weatherproofing
You don’t need expensive gear to protect your power station. Most supplies come from your local hardware store.
Sealants and Adhesives
Marine-grade silicone sealant works best for outdoor electronics. It stays flexible in cold weather and bonds to plastic, metal, and rubber.
Skip regular bathroom caulk. It cracks when temperatures drop below freezing.
Protective Barriers
- Closed-cell foam tape for gaskets
- Waterproof membrane fabric
- Clear polycarbonate sheets
- Rubber grommets for cable entry
Ventilation Components
Your power station generates heat. Block airflow completely and you’ll cook the battery.
Gore-Tex style membranes let air pass through but block water droplets. You can buy small patches online for under $20.
Step-by-Step Weatherproofing Process
Step 1: Clean and Inspect Your Power Station
Start with a spotless surface. Dirt and oil prevent sealants from sticking properly.
Use isopropyl alcohol to clean all seams, ports, and connection points. Let everything dry completely before moving forward.
Check for Existing Gaps
Look for spaces around the display screen, charging ports, and where the case halves meet. These spots need attention first.
Step 2: Seal the Main Case
Apply marine silicone along case seams using steady pressure. You want a thin, even bead without gaps.
Work in 6-inch sections. Smooth each section with your finger before the sealant skins over.
Don’t Seal Everything
Leave cooling vents open. Mark them with tape so you don’t accidentally seal them shut.
Step 3: Protect Charging Ports
Charging ports are water magnets. Even a few drops can cause expensive damage.
Install rubber port covers or create hinged flaps using waterproof tape. The covers need to seal tight but open easily when you need power.
Cable Entry Solutions
Drill holes slightly smaller than your cables. Push rubber grommets into the holes, then thread cables through.
The rubber compresses around each cable, creating a watertight seal.
Advanced Weatherproofing Techniques
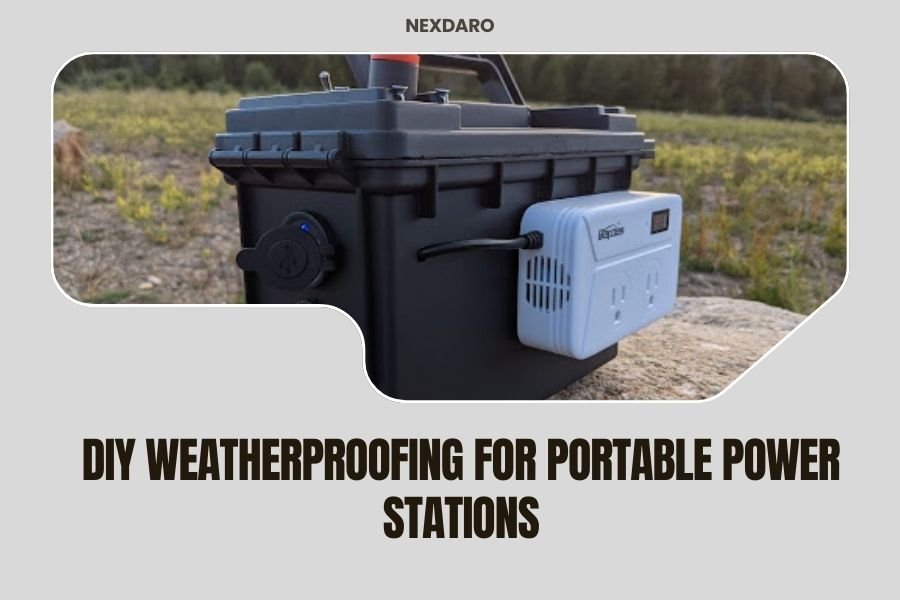
Creating a Custom Enclosure
For maximum protection, build a weatherproof box around your entire power station.
Use a clear storage container that’s 25% larger than your power station. This gives you room for air circulation.
Ventilation Planning
Install intake vents near the bottom and exhaust vents at the top. Hot air rises naturally, creating airflow without fans.
Cover vents with breathable waterproof membrane. Secure the membrane with contact cement for a permanent seal.
Temperature Management
Extreme temperatures hurt battery life more than moisture does.
Insulate your enclosure with closed-cell foam. It blocks heat transfer while resisting moisture absorption.
Condensation Prevention
Throw a few silica gel packets inside your enclosure. They absorb moisture from temperature swings.
Replace the packets every six months or when they feel heavy with absorbed water.
Common Weatherproofing Mistakes
Over-Sealing Problems
Sealing every opening seems smart but creates bigger problems. Trapped heat kills batteries faster than water damage.
Your power station needs to breathe. Block air circulation and internal temperatures can hit 140°F or higher.
Using Wrong Materials
Regular duct tape fails in cold weather. The adhesive becomes brittle and peels off.
Gorilla tape or marine-grade tape costs more but stays stuck in harsh conditions.
Sealant Selection Errors
Avoid sealants containing acetic acid. They corrode electronic components over time.
Read labels carefully. Look for “electronics safe” or “non-corrosive” on the package.
Testing Your Weatherproofing
Water Resistance Check
Test your work before trusting it in the field. Spray your sealed power station with a garden hose for 30 seconds.
Check for water entry around all sealed areas. Fix any leaks immediately.
Temperature Testing
Run your power station inside its weatherproof enclosure for one hour. Monitor internal temperature with a digital thermometer.
If temperatures exceed 100°F, add more ventilation or reduce insulation thickness.
Real-World Testing
Leave your weatherproofed station outside overnight during light rain. Check for moisture inside the next morning.
Start with mild conditions before trusting your protection in severe weather.
Maintenance and Monitoring
Regular Inspection Schedule
Check your weatherproofing every three months. Look for cracked sealant, loose covers, or damaged membranes.
Temperature cycling makes materials expand and contract. This creates gaps over time.
Seasonal Updates
Winter requires different protection than summer. Add insulation before cold weather arrives.
Remove extra insulation when temperatures warm up. Your power station needs more cooling in hot weather.
Component Replacement
Rubber gaskets last about two years outdoors. UV radiation makes them brittle and less flexible.
Replace weatherstripping annually for best protection. It’s cheaper than replacing your power station.
Cost-Effective Protection Options
| Protection Level | Materials Cost | Time Required | Weather Rating |
|---|---|---|---|
| Basic Sealing | $15-25 | 2 hours | Light rain, dust |
| Port Protection | $30-45 | 4 hours | Moderate rain, wind |
| Full Enclosure | $50-75 | 6 hours | Heavy weather |
Budget-Friendly Alternatives
Can’t afford marine-grade materials? Automotive weatherstripping works almost as well for half the price.
Check auto parts stores for door seal material. It handles temperature swings and stays flexible for years.
Emergency Weather Protection
Quick Protection Methods
Caught in unexpected weather? Plastic bags and rubber bands provide temporary protection.
Double-bag your power station with the opening facing down. Secure with multiple rubber bands around the cables.
Condensation Concerns
Remove plastic protection as soon as possible. Trapped moisture creates condensation that damages electronics.
Let your power station air dry completely before sealing it back up.
Conclusion
DIY weatherproofing your portable power station takes just a weekend and costs under $75. The protection you gain prevents thousands in replacement costs.
Start with basic sealing around case joints and charging ports. Add ventilation to prevent overheating. Test everything before heading into harsh conditions.
Remember that weatherproofing needs maintenance. Check seals every few months and replace worn materials promptly. Your power station will reward you with years of reliable outdoor service.
How long does DIY weatherproofing last on a power station?
Most DIY weatherproofing lasts 18-24 months with regular maintenance. Marine-grade sealants and quality rubber gaskets provide the longest protection. Inspect seals every three months and replace materials showing cracks or flexibility loss.
Can weatherproofing void my power station warranty?
Modifications can void warranties if they cause damage or prevent access to serial numbers. Check your warranty terms before sealing. Many manufacturers allow external protection that doesn’t modify the original case or internal components.
What’s the biggest weatherproofing mistake people make?
Blocking all air circulation is the most common error. Power stations generate significant heat during operation. Complete sealing causes overheating that damages batteries and electronics faster than weather exposure would.
Is it safe to use a weatherproofed power station indoors?
Yes, weatherproofed stations work fine indoors if ventilation remains adequate. Remove any full enclosures to prevent overheating. Basic sealing around ports and case joints doesn’t affect indoor operation or safety.
How do I weatherproof charging cables and connections?
Use dielectric grease on metal connections to prevent corrosion. Cover unused ports with rubber caps or waterproof tape. For permanent outdoor installations, use weatherproof electrical boxes rated for your power requirements.