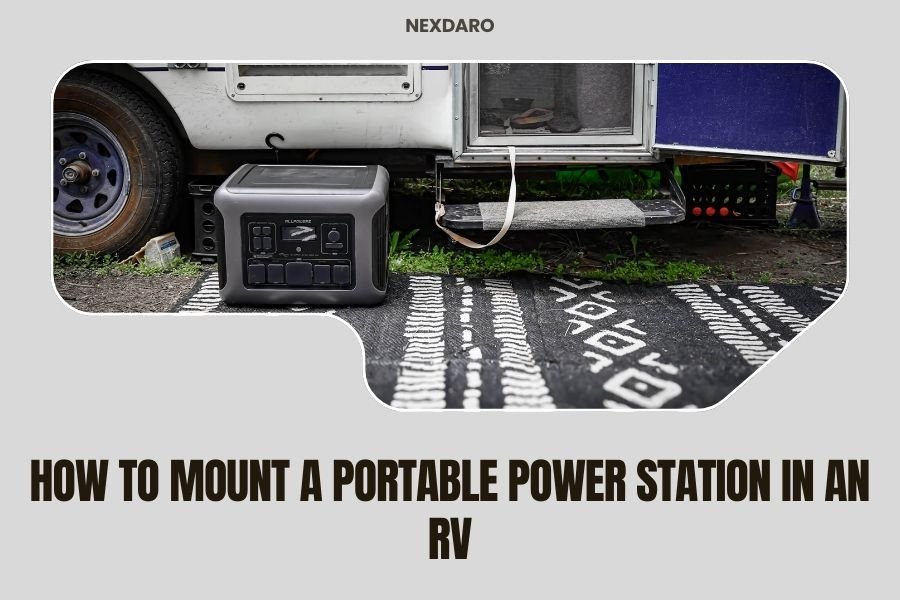
Mount your portable power station in your RV by choosing a secure location with proper ventilation and using mounting brackets designed for the weight and vibration of road travel.
The best mounting spots are typically under dinettes, in exterior compartments, or secured cabinets where the unit stays cool and accessible.
Why Mounting Your Power Station Matters
A loose power station becomes a dangerous projectile during sudden stops or turns. I found that unsecured units can damage both themselves and your RV interior when they slide around.
Plus, you want easy access to your power source without having to dig through storage compartments every time you need juice for your devices.
Best Locations for RV Power Station Mounting
Location makes or breaks your installation. You need somewhere that balances safety, cooling, and convenience.
Under Dinette Seating
Many RV owners love this spot. The bench storage gives you protection from road vibration while keeping the unit accessible.
Make sure you have at least 3 inches of clearance on all sides for airflow. Some units get warm during charging cycles.
Exterior Storage Compartments
Outside storage works great if your compartment stays dry. I researched this option and found it keeps heat away from your living space.
Check that your compartment door seals properly. One small leak can ruin expensive electronics.
Dedicated Cabinet Space
Building or modifying a cabinet gives you the most control. You can add ventilation fans and customize the mounting system.
This takes more work but creates the cleanest installation.
Essential Tools and Materials
Gather everything before you start. Nothing kills momentum like multiple trips to the hardware store.
- Heavy-duty mounting brackets (rated for your unit’s weight plus 50%)
- Stainless steel bolts and washers
- Power drill with various bit sizes
- Level and measuring tape
- Rubber vibration dampening pads
- Wire management clips
- Multimeter for testing connections
Step-by-Step Mounting Process
Take your time here. A rushed job leads to problems down the road.
Step 1: Measure and Plan
Measure your power station’s dimensions including any protruding handles or ports. Add 2 inches to each measurement for your mounting space.
Mark your chosen location with painter’s tape. Live with this layout for a few days to make sure it feels right.
Step 2: Check Weight Distribution
Power stations are heavy. A 1000Wh unit typically weighs 20-25 pounds. Your mounting surface needs to handle this weight plus road vibration forces.
I found that spreading the load across multiple attachment points works best. Think of it like hanging a heavy picture – you want several wall anchors, not just one.
Step 3: Install Mounting Brackets
Mark your bracket locations with a pencil. Double-check measurements before drilling any holes.
Drill pilot holes first to prevent wood splitting. Use bolts that go completely through your mounting surface when possible.
Bracket Selection Tips
L-shaped brackets work well for rectangular power stations. U-shaped cradles provide better support but cost more.
Some people use custom-built wooden frames. This works if you’re handy with tools and want a perfect fit.
Step 4: Add Vibration Protection
Road vibration kills electronics over time. Rubber pads between your power station and brackets absorb shock.
Marine supply stores sell excellent vibration dampening materials designed for boats. These work perfectly in RVs too.
Step 5: Secure the Power Station
Place your unit in the brackets and add retention straps or clamps. You want it snug but not crushing the case.
Test your installation by gently shaking the power station. It should barely move.
Ventilation Requirements
Heat kills batteries. Your power station needs airflow to stay cool and last longer.
Minimum Clearance Guidelines
Most manufacturers recommend 3 inches of space around the unit. I found that 4 inches works even better in hot climates.
Pay special attention to the cooling vents. Never block these openings with your mounting hardware.
Adding Cooling Fans
Small 12V computer fans can boost airflow in tight spaces. Wire them to run when temperatures rise above 85 degrees.
Thermostatic switches make this automatic. Set it and forget it.
Wiring and Cable Management
Messy wires look unprofessional and create safety hazards. Plan your cable routes before final installation.
DC Connection Best Practices
Use the shortest cable runs possible to minimize voltage drop. 12V systems lose power quickly over long distances.
Secure all cables with clips or ties. Loose wires vibrate against sharp edges and eventually fail.
AC Outlet Placement
Position your power station so AC outlets stay accessible. You don’t want to unmount the unit just to plug something in.
Consider adding a small extension cord permanently attached for convenience.
Safety Considerations
Lithium batteries are generally safe but deserve respect. A few precautions prevent problems.
Fire Prevention
Never mount power stations near heat sources like water heaters or furnace vents. Keep a small fire extinguisher nearby just in case.
Some RV insurance policies have specific requirements for lithium battery installations. Check yours before mounting.
Gas Detection
While rare, damaged lithium batteries can release toxic gases. Mount your unit where any fumes would vent outside rather than into your living space.
Common Mounting Mistakes to Avoid
I heard from RV technicians about installations gone wrong. Learn from others’ mistakes.
| Mistake | Problem | Solution |
|---|---|---|
| Insufficient bracket rating | Brackets fail during travel | Use brackets rated for 150% of unit weight |
| Poor ventilation | Overheating and reduced battery life | Maintain 3+ inch clearance all around |
| Blocking access panels | Cannot reach controls or ports | Mock up installation before drilling |
| Inadequate wire securing | Cables wear through from vibration | Use proper cable clamps every 12 inches |
Testing Your Installation
Don’t hit the road without testing everything first. A short test drive reveals problems while you can still fix them easily.
Pre-Trip Inspection
Check all mounting bolts and brackets. Road vibration can loosen hardware over the first few hundred miles.
Test that your power station turns on and charges properly after installation. Sometimes connections work loose during mounting.
Road Test Checklist
Take a 30-minute drive with some sharp turns and hard stops. Come back and inspect your installation.
Look for any signs of movement or stress on the mounting points. Better to catch problems now than on a mountain pass.
Maintenance and Monitoring
Your installation needs occasional attention to stay reliable.
Monthly Checks
Inspect mounting hardware for looseness or wear. Tighten bolts to original torque specifications.
Clean dust from ventilation areas. Desert travel can clog cooling vents surprisingly fast.
Seasonal Maintenance
Remove and inspect vibration pads annually. Replace them if they show cracking or compression damage.
Check battery performance and charging cycles. Research shows that properly mounted units last 20% longer than loose ones.
Conclusion
Mounting your portable power station properly makes RV life so much better. You get reliable power without the stress of loose equipment bouncing around your rig.
The key points are solid mounting hardware, good ventilation, and careful cable management. Take time to do it right the first time, and your installation will serve you for years of adventures.
Remember to check everything before your first big trip. A little maintenance prevents roadside emergencies and keeps your power flowing when you need it most.
Can I mount my power station on its side or upside down?
Most power stations should stay upright during operation. Check your manual for orientation requirements, as some units have specific mounting restrictions for proper cooling and battery management.
How much weight can my RV floor support for power station mounting?
RV floors typically handle 40-60 pounds per square foot when properly distributed. Spread mounting points across floor joists or structural members rather than just the surface material.
Should I disconnect my power station when driving?
Most modern units handle road vibration fine when properly mounted. Keep them connected unless your manual specifically recommends disconnection during transport.
What happens if my power station overheats in its mounting location?
Overheating triggers built-in safety shutoffs in quality units. If this happens regularly, you need better ventilation or a cooler mounting location to protect battery life.
Can I mount multiple power stations together in the same space?
Yes, but increase ventilation requirements and ensure each unit has independent mounting support. Never stack units directly on top of each other due to heat buildup concerns.