How to Set Up a Power Station for a Cargo Van Build?
On this page (8 sections)
- Setting Up Your Cargo Van’s Electrical Power System
- Choosing Your Power Storage: Batteries for Your Van
- Converting Your Power: The Role of the Inverter
- Managing Charging: The Charge Controller Explained
- Wiring It All Together: Safety First!
- A Simple Checklist for Your Setup
- Conclusion
- Frequently Asked Questions
Setting up a power station for your cargo van is essential for off-grid living or just keeping your devices charged. The core of your power station involves selecting the right battery, inverter, and charge controller. You’ll connect these components to manage and distribute your electricity effectively, ensuring you have power when and where you need it for your van build.
Many van dwellers wonder about the best way to power their adventures. A well-designed power station can run everything from your lights and fridge to your laptop and camera gear. It’s all about matching your energy needs with the right setup, making sure you have a reliable source of power without draining your vehicle’s main battery.
- Choose the right battery capacity for your needs.
- Understand inverter sizing for your appliances.
- Select a charge controller that matches your solar setup.
- Connect components safely for reliable power.
- Plan your wiring and fuse protection carefully.
Let’s walk through exactly how to get your cargo van’s power station up and running, step by step.
“`htmlSetting Up Your Cargo Van’s Electrical Power System
Getting your cargo van’s power station set up might seem daunting. But don’t worry, we’ll break it down into simple steps. Your power station is the heart of your van’s off-grid capabilities. It keeps your lights on, your fridge running, and your devices charged. It’s like giving your van its own personal power grid.
Think of it as a mini-home electrical system. You’ll have a way to store power, convert it, and manage how it’s delivered. This system is key for any van build aiming for comfort and convenience. We’ll cover the main components and how they work together.
Choosing Your Power Storage: Batteries for Your Van
The battery is where your power lives. It’s like a rechargeable fuel tank for electricity. The type and size of battery you choose will determine how long you can run your appliances. You need to match this to your power usage. What are you planning to run? A simple LED light and phone charger need much less power than a full fridge and microwave.
Deep Cycle Batteries: The Van Dweller’s Choice
For most van builds, you’ll want deep cycle batteries. These are designed to be discharged and recharged many times. Unlike car batteries, which are made for short bursts of power to start an engine, deep cycle batteries can handle steady, prolonged use. We found that Lithium Iron Phosphate (LiFePO4) batteries are increasingly popular. They are lighter, last longer, and can be discharged more deeply than lead-acid types (RV University).
Battery Capacity: How Much Power Do You Need?
Battery capacity is measured in amp-hours (Ah). To figure out what you need, make a list of all your electrical devices. Then, estimate how many hours each day you’ll use them. Multiply the wattage of each device by its daily usage time. Add all these watt-hours together. Divide that total by your system’s voltage (usually 12V for vans). This gives you your daily amp-hour requirement. To determine your needs, learn how to calculate your daily amp-hour requirement.
For example, if you need 100Ah per day and want to keep a 50% reserve (so you don’t drain the battery too much, which shortens its life), you’d aim for at least a 200Ah battery bank. Many guidelines suggest not discharging lead-acid batteries below 50% to maximize their lifespan (Battery University). LiFePO4 batteries can often be discharged to 80% or more.
Connecting Multiple Batteries
Sometimes, one battery isn’t enough. You might need to connect multiple batteries. Connecting batteries in parallel increases the total amp-hour capacity while keeping the voltage the same (e.g., two 12V 100Ah batteries in parallel give you a 12V 200Ah bank). Connecting in series increases the voltage but keeps the amp-hour capacity the same (e.g., two 12V batteries in series give you a 24V 100Ah bank). Most van systems run on 12V, so parallel connections are more common.
Converting Your Power: The Role of the Inverter
Your batteries store power, usually as DC (Direct Current). Many of your home appliances, like laptops, blenders, or even phone chargers, run on AC (Alternating Current). An inverter’s job is to convert the DC power from your batteries into AC power for these devices. If it fails, see whether power station inverter replacement is practical for your unit. It’s like a translator for your electricity.
Inverter Size Matters: Wattage is Key
Inverters are rated in watts. You need to choose an inverter with enough wattage to power your appliances. Look at the wattage listed on your appliance’s label. Add up the wattage of all the devices you might run simultaneously. It’s wise to choose an inverter with a continuous wattage rating higher than your total anticipated load. Many appliances also have a “surge” or “peak” wattage when they first start up (like a refrigerator compressor). Ensure your inverter can handle this surge.
Pure Sine Wave vs. Modified Sine Wave Inverters
There are two main types: pure sine wave and modified sine wave. Pure sine wave inverters produce clean power, similar to what comes from your home outlet. They are more expensive but are essential for sensitive electronics like laptops, medical equipment, and some modern appliances. Modified sine wave inverters are cheaper but can cause issues with some electronics, leading to humming noises or damage over time. For a reliable van power system, we found that investing in a pure sine wave inverter is generally the best choice (Consumer Reports).
Managing Charging: The Charge Controller Explained
If you plan to use solar panels, a charge controller is a non-negotiable component. It acts as a regulator between your solar panels and your batteries. Its main job is to prevent overcharging your batteries, which can damage them. It also helps optimize the charging process.
MPPT vs. PWM Charge Controllers
There are two main types of charge controllers: PWM (Pulse Width Modulation) and MPPT (Maximum Power Point Tracking). PWM controllers are simpler and less expensive. They are suitable for smaller solar setups. MPPT controllers are more advanced and efficient. They can extract more power from your solar panels, especially in varying light conditions or with higher voltage panels. For most van builds using solar, an MPPT charge controller is recommended for better performance and efficiency (NREL).
Sizing Your Charge Controller
You’ll need to size your charge controller based on your solar panel wattage and voltage, as well as your battery bank voltage. Check the specifications carefully. The controller must be able to handle the maximum current (amperage) your solar array can produce and the voltage from your panels. It also needs to be compatible with your battery type (e.g., lead-acid, lithium).
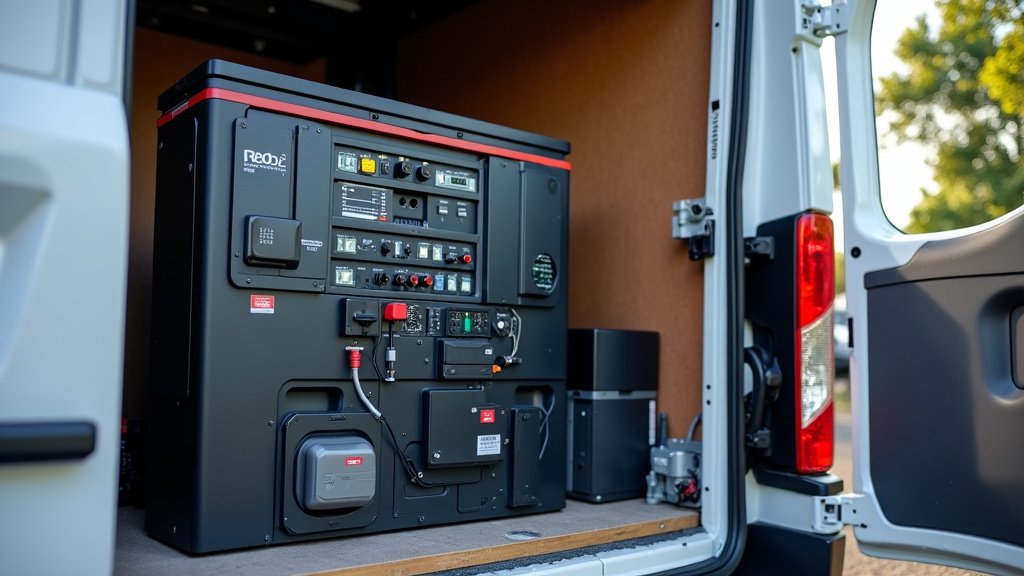
Wiring It All Together: Safety First!
Connecting your power station components requires careful planning and execution. Safety is absolutely paramount here. Working with electricity can be dangerous if not done correctly. We strongly advise consulting wiring diagrams and ensuring all connections are secure and properly insulated. For airflow around the unit, see our guide to venting a power station in a van.
Fuses and Circuit Breakers: Your Safety Net
Fuses and circuit breakers are critical for protecting your system and preventing fires. They act as safety devices. If too much current flows through a wire (a short circuit or overload), the fuse will blow or the breaker will trip, interrupting the flow of electricity. You need to install fuses or breakers on the positive wire from your battery to your inverter, from your solar panels to your charge controller, and from your charge controller to your batteries. Each component manufacturer will specify the correct fuse or breaker size for their equipment.
Wire Gauge: The Right Size for the Job
The thickness of your wires, known as the wire gauge, is very important. Using wires that are too thin for the amount of current they carry can cause them to overheat, melt, and even start a fire. You need to calculate the appropriate wire gauge based on the current (amps) and the length of the wire run. There are online calculators and charts available to help you determine the correct gauge for each connection (Blue Sea Systems).
Connecting Components: A General Order
A common order for connecting components is:
- Connect the charge controller to the battery bank first. This allows the controller to sense the battery voltage.
- Connect the solar panels to the charge controller.
- Connect the inverter to the battery bank (via a fuse or breaker).
- Connect your DC loads (lights, fans, etc.) to a DC fuse block, which is also powered by the battery bank.
A Simple Checklist for Your Setup
Here’s a quick checklist to keep you on track:
- Calculate your power needs: List all appliances and estimate daily usage.
- Select battery type and size: Ensure it meets your capacity needs and voltage requirements.
- Choose an inverter: Match its continuous and surge wattage to your AC appliances.
- Pick a charge controller: Ensure it’s compatible with your solar panels and battery type.
- Source correct wire gauge and fuses: Use calculators and manufacturer specs for safety.
- Plan your wiring diagram: Map out all connections before you start wiring.
Taking the time to plan and install your power station correctly will pay off in reliable power for all your adventures.
“`Conclusion
You’ve learned the core components and steps to build your cargo van’s power station. Selecting the right battery, inverter, and charge controller is key to reliable off-grid living. Proper wiring, fusing, and wire gauge selection ensure your system is safe and efficient. Taking the time to plan and execute these steps will provide you with the dependable power you need for all your adventures.
Your next step? Start sketching out your system. Create a detailed list of your power needs and begin researching the specific components that best fit your van build.
Frequently Asked Questions
What’s the best type of battery for a cargo van build?
For most van builds, Lithium Iron Phosphate (LiFePO4) batteries are highly recommended. They are lighter, last much longer, and can be discharged more deeply than traditional lead-acid batteries. While more expensive upfront, their longevity and performance often make them a better long-term investment for your power needs.
How do I determine the right size inverter for my van?
You need to calculate the total wattage of all the AC appliances you plan to run simultaneously. Look at the continuous wattage rating for each device. It’s wise to choose an inverter that can handle a bit more than your peak expected load, also accounting for any surge wattage that appliances like refrigerators might draw when starting up.
Do I really need a pure sine wave inverter?
Yes, for most van builds, a pure sine wave inverter is the best choice. It produces clean, stable power similar to what you get from your home outlet. This type of power is essential for sensitive electronics like laptops, cameras, and modern appliances, preventing potential damage or performance issues.
How do I connect multiple batteries in my van?
Connecting batteries in parallel increases your total amp-hour capacity while keeping the voltage the same (usually 12V for vans). Connecting them in series increases the voltage. For most van builds, you’ll connect batteries in parallel to create a larger power bank, ensuring you have enough stored energy.
What are fuses and circuit breakers for in a van’s power system?
Fuses and circuit breakers are your safety net. They protect your system and your van from electrical fires. If there’s an overload or a short circuit, these devices will interrupt the power flow. You should install them on the positive wires of major components like your battery, inverter, and charge controller connections.