How to Install a Renogy Solar Panel Kit
To install a Renogy solar panel kit, mount the panels securely, connect the wiring in the correct order, and verify the controller settings before connecting loads. Plan the system around your battery voltage, panel arrangement, cable path, and controller limits.
On this page (9 sections)
- What do you need before installing a Renogy solar panel kit?
- How should you plan the panel location?
- How do you mount Renogy solar panels?
- How do you wire a Renogy solar panel kit?
- What is the correct connection order?
- How do you connect a panel kit to a battery?
- How do you test a Renogy solar panel installation?
- Which Renogy panel suits your installation?
- What should you check after installation?
To install a Renogy solar panel kit, choose a clear mounting location, secure the panels, connect a correctly sized charge controller, and test the system before using it. The safe order is planning, mounting, wiring, battery connection, solar connection, and final checks.
This guide covers a small off-grid setup for an RV, van, cabin, marine application, or backup system. Compare RV solar panel kits for more options.
It does not replace the instructions for your exact Renogy panel, controller, battery, inverter, or power station.
What do you need before installing a Renogy solar panel kit?
You need solar panels, a compatible charge controller, a battery or power station, suitable cables, mounting hardware, and basic electrical protection. For bundled options, compare solar panel kits with batteries.
You also need a multimeter, cable labels, fasteners suited to the mounting surface, and a way to keep cables protected from rubbing or water.
Check the panel voltage and current against the controller's maximum PV input ratings. Then confirm that the controller supports your battery chemistry and system voltage.
Your battery choice affects the rest of the installation. Use how to choose a battery for Renogy solar panels before buying a battery or controller.
Also decide whether the system will charge a battery directly or connect to a portable power station. A portable station may need a specific connector, voltage range, and input limit.
How should you plan the panel location?
Install the panels where they receive direct sunlight for the longest useful part of the day. Avoid chimneys, roof rails, trees, vents, roof equipment, and other objects that can cast shade across the panel.
Measure the available surface before drilling. Leave room for cable bends, connector access, airflow where the instructions call for it, and future maintenance.
For a vehicle or roof, plan the cable route before mounting anything. Keep the route short, protect entry points from water, and prevent cables from touching sharp metal edges.
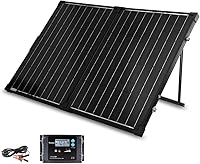
A portable panel needs a stable, open position rather than permanent roof mounting. The Renogy 400W Portable Solar Panel folds to 33.7 x 27.95 in, weighs 30.2 lb, and includes a carry case.
This panel uses MC4 output cables. Renogy states that its 4-in-1 adapter cable is sold separately, so confirm the connector and input requirements before connecting it to a power station.
For more portable setup ideas, see how to use a suitcase solar panel with your station.
How do you mount Renogy solar panels?
Mount the panels on a rigid, level surface with hardware that suits the panel frame and mounting surface. Keep the frame supported at its mounting points and avoid placing fasteners where they can contact the cells or damage the frame.
Follow the mounting hardware instructions for spacing and sealing. On a vehicle or roof, use suitable sealant around approved penetrations and check that the cable entry cannot collect water.
Do not carry a panel by its cables or let the cables support its weight. Route and secure them after the panel is fixed in place.
A two-panel setup can help when you need more collection area without using one large panel. For ready-made options, compare 200W solar panel kits.
The Renogy Solar Panels 100W 2PCS includes 2 100W panels, each designed for 12V battery systems, with an IP67 rating and Solar Connector connections.
Before drilling, compare your available surface with the panel dimensions of 34.1 x 22.8 x 1.2 in for each panel. A compact layout can make expansion easier, but every panel still needs secure support.
How do you wire a Renogy solar panel kit?
Wire panels in series when you need more voltage, or in parallel when you need more current, while staying inside the controller's limits. Series wiring connects the positive lead of one panel to the negative lead of the next.
Parallel wiring joins positive leads together and negative leads together with suitable connectors.
Series connections add panel voltage while current stays close to the current of one panel. Parallel connections keep voltage closer to one panel while current increases.
Do not choose a wiring method from panel wattage alone. Check the controller's maximum PV voltage and current, the panel open-circuit voltage, and the number of panels in the array.
The Renogy Solar Panels 200 Watt N-Type is a 24V panel for compatible 12V and 24V battery systems. It has a maximum voltage of 37.44V and an amperage capacity of 6.85A, so controller limits matter when connecting one or more panels.
Use matching connectors and keep polarity consistent. Before connecting to the controller, label positive and negative wires and use a multimeter to confirm polarity.
For a broader comparison of panel types and layouts, read which solar panel is best.
What is the correct connection order?
Connect the battery to the charge controller first, then connect the solar array, and finally connect loads or an inverter. This order helps the controller recognize the battery system before solar input is applied.
Switch off or isolate every power source before making changes. Cover rigid panels or keep them out of direct sun during wiring when practical, because illuminated panels can produce voltage.
A basic sequence is:
- Confirm the battery voltage and controller settings.
- Connect the controller to the battery with the correct polarity.
- Add the required fuse or breaker close to the battery.
- Connect the solar panel cables to the controller.
- Confirm that the controller shows solar input and charging.
- Connect the DC load or inverter after the first checks pass.
Never short a panel connector or reverse the battery polarity. If the controller shows an error, stop and check the manual, wiring, voltage, and fuse before trying again.
How do you connect a panel kit to a battery?
Connect the controller's battery terminals to the battery with cables sized for the expected current and run length. Place the required overcurrent protection close to the battery's positive terminal.
Keep battery cables short where possible, and protect them from heat, water, abrasion, and moving parts. Battery terminals can deliver high current, so remove metal jewelry and use insulated tools.
Set the controller for the correct battery type and voltage. A panel's stated system voltage does not mean that its measured output will match that number at every moment.
If you are using an inverter, confirm that its input voltage matches the battery system. Connect the inverter only after the battery and controller wiring has been checked.
How do you test a Renogy solar panel installation?
Test the system in stages instead of connecting every device at once. Start with the battery, then solar input, then charging behavior, and finally the intended load.
Check these points:
- The controller identifies the correct battery voltage.
- Panel polarity is correct.
- The controller shows solar voltage or charging input.
- Connectors are fully seated.
- Cables remain cool and protected.
- The battery voltage changes as charging begins.
- The inverter or load does not exceed the system's limits.
Output will vary with sun angle, clouds, temperature, shade, dirt, cable length, and the input limit of the connected device. A 200W panel will not produce 200W continuously, and a 400W portable panel may produce less under weak sunlight.
If production is unexpectedly low, move the panel into direct sun, inspect connectors, clean the surface with an approved method, and check for shading. Do not disconnect live connectors under load unless the instructions specifically allow it.
Which Renogy panel suits your installation?
Choose the Renogy Solar Panels 100W 2PCS when a 2-panel 12V layout fits your roof, van, trailer, or cabin. Choose the Renogy 400W Portable Solar Panel when portability and power-station charging matter more than permanent mounting.
Choose the Renogy Solar Panels 200 Watt N-Type when you have room for one larger panel and a compatible 12V or 24V system. Its 24V system designation requires careful controller selection.
You can compare more options in best Renogy solar panels, best Renogy solar panel kit, and best Renogy 100W solar panels.
What should you check after installation?
Inspect the mounting, cable protection, connectors, controller settings, and battery protection before leaving the system unattended. Recheck fasteners and cable clamps after the first trip or period of vibration.
Keep the panels clean and inspect them after severe weather or transport. For portable panels, fold and store them only when dry, and protect the connectors from dirt and water.
The safest installation rule is simple: match every component's voltage and current limits, connect the battery before solar input, and stop when a reading or connection does not make sense. For another complete option, compare a best solar generator kit with panels.
Frequently asked questions
Can I install a Renogy solar panel kit myself?
You can handle a small off-grid installation if you understand the wiring, use compatible components, and follow the panel, controller, battery, and inverter instructions. Turn off power before changing connections.
Roof, vehicle, and permanent electrical work may need a qualified installer.
Should I connect the solar panel or battery first?
For a solar charge controller, connect the battery first unless Renogy's instructions for your exact controller say otherwise. The battery connection lets the controller identify the system voltage.
Connect the solar array afterward, then add loads or an inverter.
Can Renogy solar panels be connected in series or parallel?
Many Renogy panels support series or parallel wiring, but the correct choice depends on the controller's voltage and current limits. Series wiring adds panel voltage, while parallel wiring raises current.
Check the panel and controller ratings before joining connectors.
Why is my Renogy solar panel producing less power?
Output changes with sun angle, clouds, heat, shade, cable length, dirt, and the connected device's input limits. A panel's watt rating is measured under standard test conditions, so lower real-world output can be normal.
Check shade, connectors, polarity, and cleanliness first.