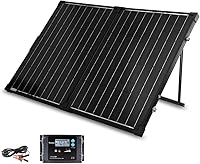
How to Connect MC4 Connector to Charge Controller
Connect an MC4 connector to a charge controller with matching PV adapter leads, correct polarity, and secure terminals. Confirm the controller's solar input limits before energizing the connection.
On this page (9 sections)
- What do you need for an MC4 connector to charge controller connection?
- How do you connect an MC4 connector to a charge controller?
- How do you identify the correct charge controller terminals?
- Can an MC4 Y connector connect directly to a charge controller?
- Is a large connector set useful for charge controller wiring?
- When is a smaller MC4 connector kit a better fit?
- How do you check polarity before connecting the PV terminals?
- What should you check after connecting the MC4 leads?
- What is the safest way to finish an MC4 controller connection?
To connect an MC4 connector to a charge controller, use the panel's MC4 leads with correctly matched adapter cables, verify positive and negative polarity, and land the adapter ends on the controller's PV terminals. For extra reach on an EcoFlow setup, compare EcoFlow solar extension cables.
Keep the solar input disconnected while you prepare the wiring.
A charge controller usually does not accept an MC4 plug directly unless it has built-in MC4 sockets. Compare 12V MPPT charge controllers when selecting a controller.
Most controllers use screw terminals or another terminal style, so you need a short PV lead with an MC4 connector at one end and a controller-ready end at the other.
What do you need for an MC4 connector to charge controller connection?
You need a compatible MC4-to-terminal lead, the solar charge controller, the panel cable, and a polarity-checking meter. You may also need a fuse or disconnect if the system design and controller instructions call for one.
Check the panel's cable size, the controller's PV voltage and current limits, and the terminal opening before choosing an adapter. A connector can fit mechanically while still being wrong for the circuit's wire size or electrical limits.
If you're still choosing a panel, our guide to which solar panel is best explains the factors that affect a controller connection. For connector choices, see best mc4 connectors for solar panels.
How do you connect an MC4 connector to a charge controller?
Connect the battery side as directed by the controller manual, then connect the panel adapter leads to the PV terminals with polarity confirmed. The basic process is:
- Cover the solar panel or disconnect it from direct sunlight.
- Turn off the controller and isolate the battery if the manual requires it.
- Identify the panel positive and negative MC4 leads.
- Plug each panel lead into the matching MC4 end of the adapter.
- Check the adapter output with a multimeter.
- Connect positive to PV positive and negative to PV negative.
- Tighten the controller terminals without crushing the wire.
- Restore power in the order required by the controller manual.
Do not rely only on red and black insulation. Use the meter's polarity reading, because cable colors and previous wiring may not always match your assumption.
For connector assembly and cable preparation, read how to wire mc4 connectors. That guide is useful if you need to add a connector to a loose solar cable rather than use a finished adapter lead.
How do you identify the correct charge controller terminals?
Use the terminals marked PV positive and PV negative, not the battery or load terminals. Controllers often group solar, battery, and load connections together, so read the printed labels and manual before inserting a wire.
The solar panel connects to the controller's PV input. The battery connects to the battery terminals, while a load connection, if present, belongs on the load terminals.
Strip only the amount of insulation needed for the terminal. Make sure no loose strands touch the neighboring terminal, then give each wire a gentle pull after tightening.
Which adapter lead should you choose?
Choose an adapter lead with an MC4 end that matches the panel cable and a controller end that suits the controller terminal. The conductor size must also fit the current and the terminal opening.
Avoid forcing a connector pair together. MC4-style connectors should mate smoothly, and a loose or partially engaged connection can create heat or intermittent charging.
Can an MC4 Y connector connect directly to a charge controller?
An MC4 Y connector combines two compatible solar panel leads in parallel, but it does not replace the adapter lead needed at the controller. Use it only when the panel arrangement and controller support the resulting current.
The LiuBaiWuQuStars 4pcs mc4 y connectors are made for 1-to-2 parallel connections. They use 6mm² (10AWG) stranded wire, have a 30A rated current and a DC 1000V rated voltage, and support PV cables from 14AWG to 10AWG.
The set includes M/FF and F/MM Y branch configurations, with red and black parts to help distinguish polarity. Its connector design includes IP67 waterproofing, UL94-V0 flame retardance, and a stated working temperature range of -49°F to 194°F.
Use a parallel connector only after checking the controller's maximum PV input current. Combining panels can increase current even when the voltage remains similar.
For a circuit that needs added protection, compare best mc4 connector with fuse before choosing a fuse arrangement.
Is a large connector set useful for charge controller wiring?
A large connector set suits repeated cable work, spare parts, or several small photovoltaic installations. It is less useful if you need only one finished adapter and have no plans to assemble additional solar cables.
The LEPITERY 100PCS MC4 Soar Connectors Solar Panel set contains 50 male connectors, 50 female connectors, 50 pairs of connector pins, and 2 spanners. It is rated at 1000V DC and 30A, with IP67 waterproofing and a stated operating range of -40°F to 221°F.
The connectors use PPO insulation and tin-plated copper conductor pins. They support PV cables from 2.5mm² to 6mm², or AWG14 to AWG10, and the package includes spanners for assembly and removal.
Use the supplied connector type only with compatible cable sizes. A waterproof shell does not correct a poor crimp, damaged seal, loose pin, or mismatched connector pair.
When is a smaller MC4 connector kit a better fit?
A smaller kit works well when you need several replacement connectors without the volume of a 50-pair set. It can support repairs, new cable ends, or a compact solar setup that uses compatible 10AWG to 14AWG cable.
The Usngsny 40 PCS Solar Connectors set includes 20 pairs of male and female connectors, 20 pairs of connector pins, and 1 pair of spanners. It is rated IP67, 1000V, and 30A, and supports 10AWG to 14AWG or 2.5mm² to 6mm² solar cables.
Its connector pins are tinned copper, and its insulation is PPO. The stated operating temperature range is -40°F to 221°F.
This kit may be easier to store than a larger pack. It still requires careful cable preparation and a secure connection at each terminal.
How do you check polarity before connecting the PV terminals?
Check the open-circuit polarity with a multimeter while the panel is disconnected from the charge controller. Put the meter on the correct DC voltage range, then compare the reading with the panel and controller instructions.
A positive reading with the probes in the expected arrangement helps identify the positive lead. A negative reading means the probes or cable identification need attention before you connect the controller.
Keep the bare ends from touching each other. Do not connect the panel to the battery terminals or reverse the PV terminals.
If you need protective covers for unused connectors, see best mc4 connector caps. Caps help keep disconnected connector ends covered during storage or wiring work.
What should you check after connecting the MC4 leads?
Check that every connector is fully seated, every terminal is tight, and the controller shows the expected PV input. Look for warning lights, unusual heat, loose cable movement, or an unexpected voltage reading.
Check the display again after a short period of normal charging. Confirm that the battery status changes as expected and that the controller is not cycling off and on without reason.
Keep the cables supported and away from sharp edges, hot surfaces, standing water, and moving parts. Do not bend a connector at the housing or pull the cable to disconnect it.
Use the supplied spanner when you need to release a locked connector. A gentle pull on the cable can damage the seal or loosen the pin inside.
Follow How to Use a Solar Charge Controller Properly for operating order, battery setup, and controller checks. If the system feeds a power station, compare Best Solar Charge Controller For Power Station before choosing a controller.
What is the safest way to finish an MC4 controller connection?
Choose the adapter by connector type, cable size, controller terminal, and electrical limits, then verify polarity before energizing the circuit. A safe finish depends on matching each part to the system you have already planned.
Use the LiuBaiWuQuStars set for a 1-to-2 parallel connection, the LEPITERY kit for many cable ends, or the Usngsny kit for a smaller batch of compatible connectors. Each choice suits a different amount of wiring work, so match the kit to the job rather than to future plans you may never complete.
Start by confirming the panel leads, the controller terminals, and the cable size in the manual. The MC4 end must mate with the panel cable, and the other end must enter the controller terminal cleanly without loose strands.
Check polarity with a meter before you connect power. Red and black insulation can help during setup, but the reading and the printed labels should agree before you tighten the terminals.
The connector is only one part of the circuit. A secure MC4 connection still needs correct cable preparation, suitable protection, proper terminal placement, and the charge controller's required connection sequence.
Plan the cable route after the terminals are tight. Support the run so it does not hang from the connector, pull against the housing, or rest on a sharp edge.
Leave a small service loop where you may need to check the connection later. That slack makes inspection easier and reduces strain if the panel, controller, or battery is moved for care.
Keep spare caps or covers for any connector left disconnected during work. They help protect the ends from dirt and moisture while the system is not in use.
Finish by following the controller manual for the order in which power should be restored. Do not assume that every model uses the same sequence.
If a reading, light, or terminal position does not match the manual, stop and recheck the wiring. A short pause at this stage is safer than energizing a reversed or loose connection.
Frequently asked questions
Can an MC4 connector plug directly into a charge controller?
Usually, an MC4 connector needs a suitable adapter lead before it reaches a charge controller's solar terminals. Use a lead with an MC4 plug on one end and the correct stripped, crimped, or terminal-ready end for the controller.
Check the controller manual before connecting.
Which MC4 connector goes to the positive terminal?
Follow the cable markings and use a multimeter to identify polarity before connecting. The physical shape of an MC4 plug does not replace a polarity check.
Connect the panel positive lead to the controller's PV positive terminal and the panel negative lead to PV negative.
Should I connect the solar panel or battery first?
Follow the charge controller manual because connection order varies by design. Many controllers require the battery connection before the solar input, but the controller's instructions take priority.
Keep the panel covered or disconnected while preparing the wiring.
Do MC4 connectors need a fuse?
A fuse may be needed based on the panel arrangement, wire size, controller limits, and local electrical rules. Parallel panels can increase current, so review the system design before adding or leaving out protection.
Use a fuse holder and rating suited to the circuit.