How to Install a Power Inlet Box for a Power Station?
On this page (7 sections)
Installing a power inlet box for your power station is a smart way to get reliable backup power. You can connect your generator directly to your home’s electrical system. This setup provides automatic or manual power when you need it most. It’s a practical solution for home emergencies.
A power inlet box acts as a safe transfer point. It lets you safely bring generator power inside your house. This means you can run essential appliances during an outage. Many homeowners find this a great investment for peace of mind.
- Safety first when installing.
- Understand your generator’s wattage needs.
- Choose the right inlet box type.
- Proper wiring is essential.
- Test your setup carefully.
Let’s walk through how to install your power inlet box step by step. We’ll make sure you have the information you need to do it right.
Setting Up Your Generator Power Inlet Box
Getting a power inlet box installed is a fantastic move for your home’s emergency preparedness. It’s the safe gateway for generator power to reach your essential appliances. Think of it as a secure tunnel connecting your generator outside to your home’s electrical heart inside. This guide will walk you through the installation process.
Understanding Your Power Needs and Box Types
Calculating Your Wattage Requirements
Before you buy anything, you need to know how much power you’ll need. Your generator’s wattage capacity is key. You don’t want to overload it or your home’s circuits. Start by listing the essential appliances you’d want to run during an outage. This might include your refrigerator, freezer, furnace fan, some lights, a sump pump, and a few small electronics.
Add up the running watts (the power needed to keep them going) for these items. Then, look at their starting watts (the surge of power needed to turn them on). The total starting watts will usually be higher. Your generator must be able to handle this peak demand. Many generator manufacturers provide charts for typical appliance wattages. You can also find this information on the appliance’s label.
Choosing the Right Inlet Box
Power inlet boxes come in different styles and ratings. The most common types are manual transfer switch inlets and interlock kit inlets. A manual transfer switch inlet is often part of a larger manual transfer switch system. This system allows you to safely select which circuits in your home receive generator power. It’s a bit more involved but offers excellent control.
An interlock kit is a mechanical device that pairs with your home’s main electrical panel. It prevents the main breaker and the generator breaker from being on at the same time. This is a safer and often simpler solution for many homeowners. Your inlet box will need to match the type of connection your generator uses, usually a twist-lock plug. Common sizes are 20-amp, 30-amp, and 50-amp.
We found that selecting an inlet box with a weatherproof rating is important if it will be exposed to the elements. This helps protect the connections from rain, snow, and dust. Always ensure the amperage rating of the inlet box matches or exceeds the amperage of your generator’s outlet and the breaker that will protect it in your panel.
Gathering Your Tools and Materials
Once you’ve decided on the type of inlet box, it’s time to get your supplies ready. Having everything on hand makes the installation smoother. You’ll need your chosen power inlet box and any associated hardware it comes with, like mounting screws.
You’ll also need appropriate electrical wire (gauge determined by amperage and distance), a conduit to protect the wire, and a weatherproof junction box if needed. Don’t forget a double-pole breaker for your electrical panel that matches the inlet box’s amperage. This breaker is critical for safety.
Here’s a checklist of common tools you’ll likely need:
- Wire strippers
- Screwdriver set (Phillips and flathead)
- Pliers
- Voltage tester (non-contact and multimeter)
- Drill with appropriate bits
- Fish tape (if pulling wire through conduit)
- Safety glasses
- Work gloves
- Stud finder
Step-by-Step Installation Process
Step 1: Planning the Location
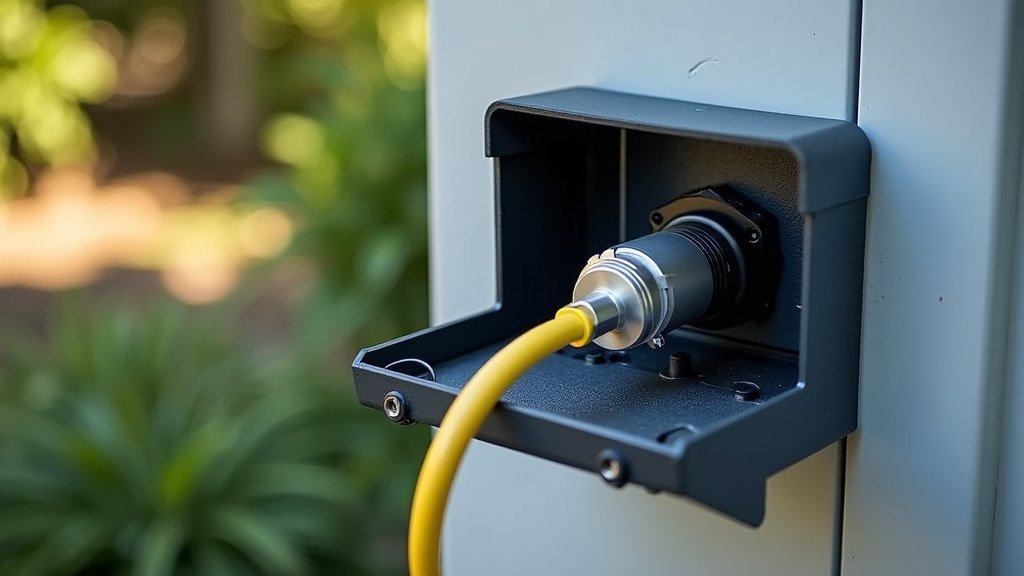
Choosing the right spot for your inlet box is crucial for safety and convenience. You’ll want to place it on an exterior wall, close to where you’ll position your generator. Keep it a safe distance from windows and doors. Local building codes often specify minimum distances from operable openings and air intakes. We found that checking your local electrical codes is a vital first step to ensure compliance.
Consider the path the electrical wire will take from the inlet box to your main electrical panel. A shorter, straighter run is generally easier and requires less wire. Make sure the location is accessible for the generator cord but also protected from accidental damage. The box should be mounted securely to the building’s structure.
Step 2: Mounting the Inlet Box
With your location chosen, it’s time to mount the box. Use a stud finder to locate a wall stud. This provides a solid anchor point. Hold the inlet box against the wall where you want it mounted and mark the screw hole locations. Drill pilot holes into the stud.
Secure the inlet box to the wall using the provided mounting screws or appropriate hardware. Ensure it’s firmly attached and doesn’t wobble. If your inlet box requires a knockout to be removed for conduit entry, do that now. You’ll want to ensure a weather-tight seal where the box meets the wall.
Step 3: Running the Electrical Wire
This is often the most challenging part. You need to run a cable from the inlet box to your main electrical panel. You’ll likely need to drill a hole through the exterior wall (from inside or outside, depending on access and protection) to create a pathway for the wire and conduit. Protect the wire with appropriate conduit, especially where it passes through walls or is exposed.
Inside the wall, the wire will travel towards your electrical panel. You might need to use fish tape to pull the wire through wall cavities or conduit. Ensure the wire is the correct gauge for the amperage rating of your inlet box and the length of the run. Using too small a gauge can cause overheating and is a fire hazard. Consult electrical code tables or a qualified electrician for the correct wire gauge (NEC Table 310.15(B)(16) is a common reference, though local codes may differ).
Step 4: Wiring the Inlet Box
Now you’ll connect the wires to the inlet box. Typically, there are three connections: hot (black), neutral (white), and ground (green or bare copper). Match the wires from your cable to the corresponding terminals on the inlet box. Many inlet boxes have clear labels. Ensure all connections are tight and secure.
If you’re using a twist-lock style inlet, make sure the plug from your generator will mate correctly. Double-check that the grounding wire is properly connected to the ground screw on the box and the ground bus in your panel. A good ground connection is essential for safety.
Step 5: Wiring the Electrical Panel
This step involves working inside your main electrical panel. Turn off the main breaker to de-energize the entire panel. If you’re uncomfortable with this, stop and call an electrician. Then, identify an available space for your new double-pole breaker.
Install the double-pole breaker. Connect the hot wires from the inlet box cable to the terminals on this new breaker. Connect the neutral wire to the neutral bus bar, and the ground wire to the ground bus bar. Ensure all connections are tight and properly seated. Double-check that no bare wires are touching each other or the metal casing of the panel.
Testing Your New Setup Safely
Once everything is wired, you’ll need to test it. First, visually inspect all connections again. Ensure all covers are back in place. Turn on the main breaker in your electrical panel. Then, turn on the new double-pole breaker for your generator circuit.
Now, take your generator outside. Connect a short, heavy-duty extension cord from the generator’s outlet to your newly installed inlet box. Start the generator. Use a voltage tester to verify that you have the correct voltage (e.g., 240V for a 30A or 50A connection) at the inlet box. Finally, connect your essential appliances or a dedicated circuit to test the power flow. Remember to turn off the generator breaker before shutting down the generator.
Many experts recommend consulting local electrical codes and potentially having a qualified electrician perform a final inspection. This ensures your installation meets all safety standards and is ready for emergency use. Your peace of mind is worth the extra check!
Conclusion
You’ve learned how to install a power inlet box, a critical step for reliable backup power. You now understand the importance of matching your generator’s wattage to your needs and selecting the correct inlet box type. The process involves careful planning, precise mounting, secure wiring, and thorough testing. Remember that safety is your top priority throughout this project.
For true peace of mind, consider having your work inspected by a qualified electrician. This ensures your setup is safe, code-compliant, and ready to provide power when you need it most.
Frequently Asked Questions
Do I need a permit to install a power inlet box?
Many local jurisdictions require permits for electrical work, including installing power inlet boxes. We found that checking with your local building department before you begin is the best way to avoid fines or having to redo the work. They can inform you about specific code requirements and inspection processes.
Can I run my generator all the time if I have an inlet box?
An inlet box is designed for backup power during outages, not continuous operation. Running your generator constantly can cause wear and tear, and most generators are not designed for prolonged, unattended use. Always follow your generator’s manufacturer guidelines for run times and maintenance.
What’s the difference between a manual transfer switch and an interlock kit inlet?
A manual transfer switch inlet is often part of a system that allows you to manually select which circuits get generator power. An interlock kit inlet, on the other hand, is a mechanical safety device that prevents the main power and generator power from being on simultaneously at your main panel. We found that the interlock kit is often simpler for homeowners.
How do I know if my generator cord will fit the inlet box?
Inlet boxes come with specific connection types and amperage ratings, typically 20-amp, 30-amp, or 50-amp twist-lock. You need to ensure the inlet box you purchase matches the outlet on your generator. Always confirm the plug type and amperage rating before buying your inlet box.
What kind of wire should I use to run from the inlet box to the panel?
The correct wire gauge depends on the amperage of your inlet box and the distance to your electrical panel to prevent overheating. We recommend consulting NEC tables or a qualified electrician to determine the proper wire gauge, such as THHN wire rated for the load and environment. Using the wrong gauge is a serious fire hazard.